Friday, December 31, 2010

Goodbye 2010

There she goes. 
2010 is leaving the building. It's been a year full of unexpected delights. After last New Years weekend with our closest friends, that we call the 'Funky Family', Matt and I promised each other we would finally go for our dream. I am overwhelmed that this is all coming together now.

The little garden I started here in an urban neighborhood in Charlotte was really a personal catalyst into a dream finally being realized. I have known my sweet husband since we were 15 years old. We have been dreaming together for 18 years now. Our long conversations on his parents' front stoop about community living and a rededication to our rural roots is finally manifesting itself. The simple life has found us.

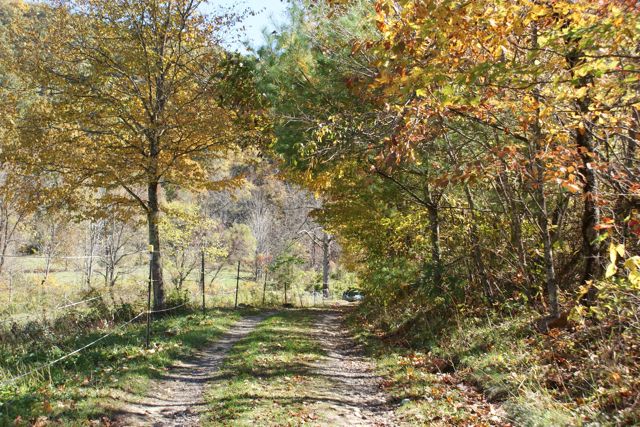
So, my little garden in the city is quiet this winter. I look at it everyday and silently thank the soil for all it has taught me. A new landscape awaits us in the mountains. 40 acres and a modest cabin in beautiful Marshall, NC. Also, a promise of daily community with out parents, extended family, and friends will be realized. How amazing! How blessed!


Our first child is expected anytime now. I'm so happy we get to give this child the gift of growing up with his/her grandparents, growing our own food, and just true experiential learning.  Oh, and of course... the sweetest tree houses you have ever seen :)

2011 is rolling in. Baby Pike is on his/her way. A move to the land is coming very soon (TBD). This blog will become a place to note the major life changes we are about to experience. Expect to read about more downsizing, new parent rants, how to pack 1400 sq ft into 750 sq ft, using a greenhouse, larger gardens (vegetable and flower), building houses, chickens, goats, hot tubs, and a whole lot more in 2011.

Happy New Year!
Grow in Peace.

Monday, November 8, 2010

Sweeeet!

This morning I decided to see how the sweet potatoes were coming along. I love digging them up. It's like a treasure hunt. I wanted to cure some to cook for Thanksgiving and needed a few weeks to make that happen. Mission accomplished! There are still some plants out there and I will harvest them later on. If you remember from my earlier blog, these potatoes are from one that I saved from our organic produce delivery. I wasn't sure how it would work out. Making my own potato slips has proven to be a good frugal gardener tip.


I also managed to train the sugar snaps up the former Cucumber Harp. It is now the Sugar Harp. At least, for another month or so. I noticed a lot of the lettuce is growing in now too. I had to plant it twice because I neglected it the first time around and all of the lettuce shriveled up in a dry spell.

Small confession...I have not been in the garden hardly at all lately. There are a lot of changes going on in our home. My body also doesn't like it when I'm bent over or digging thanks to this enormous belly I'm sporting. I'm torn about investing too much time in the garden. With the cold season coming, I will probably blog more on food! But, no worries. Next year's garden is going to be exceptional. Just wait and see!

Think Bigger. MUCH bigger.

Thursday, September 23, 2010

Real Pumpkin...Not Canned

My aversion for anything in a can has been heightened over the years. Sometimes knowing can be a real pain in the pantry. On the other hand...avoiding preservative filled and other overly processed foods has opened me up to some real flavors that I have been missing over the years. It has surely boosted the nutrition factor in our diets.

Last year I made my first real pumpkin pie with... real pumpkin. I used pumpkins that came in our organic produce box that was being delivered to the house. It really isn't that hard to pre-cook a pumpkin. It takes about 1/2 a minute to split the pumpkin and scoop out the seeds. About the same amount of time it would take to open a can with a can opener. Was that really so hard? Then I just place it face down in a little water inside of a pyrex dish. I bake it for about 45 minutes at 350 and it's ready to go. While it cooks I pre-measure out all of my ingredients.

On a side note...I rinsed and set some of the seeds aside on a paper towel. I wrap them up when they dry and save them for next year. You could also roast the seeds if you wanted too.

So, this year I had one little sweet pumpkin survive the weevil infestation. I've been staring at it for a week on my counter. It's been calling to me to cook it and put it into something yummy. I found the winner this morning. Chocolate Chip Pumpkin Muffins. OH YEAH!


The recipe I found called for canned pumpkin (of course) but I have found if you just leave out the additional water it calls for and add a tad more sugar...then you are good. I also made some other minor changes (wheat flour vs. white, added ginger because it is the best spice in the world...etc.) I'm officially claiming this as my recipe since I modified it so much. Try it and find out why real pumpkin is better than the stuff in the can with a thousand ingredients.


Makes 12 Muffins


  • 1/2 cup brown sugar
  • 1/4 cup organic white sugar
  • 1/4 cup vegetable oil
  • 2 eggs
  • 1 small sweet pumpkin cooked and scrapped out
  • 1 1/2 cups wheat flour (or you could use Red Mill Rice flour to avoid gluten)
  • 3/4 teaspoon baking powder
  • 1/2 teaspoon baking soda (I was out of baking soda...you can substitute more baking powder if this happens to you. The substitution ratio is 2 parts baking powder to 1 part baking soda)
  • 1/4 teaspoon ground cloves
  • 1/2 teaspoon ground cinnamon
  • 1/4 teaspoon salt
  • 1/4 teaspoon ground nutmeg
  • 1/4 teaspoon ginger
  • 3/4 cup dark chocolate chips


  1. Preheat the oven to 400 degrees F (200 degrees C). Grease and flour muffin pan.
  2. Mix sugar, oil, eggs. Add mashed pumpkin. In separate bowl mix together the baking flour, baking soda, baking powder, spices and salt.. Add wet mixture and stir in chocolate chips.
  3. Fill muffin cups 2/3 full with batter. Sprinkle tops with extra brown sugar. Bake in preheated oven for 20 to 25 minutes.


Enjoy!

Monday, August 30, 2010

Funky Compost

Yesterday was a work day in the garden. Not much harvesting going on. A late Summer garden can be a sad place. We still are getting lots of peppers, basil and tomatoes. I lost all of my butternut and acorn squash to weevils. I don't like those little bugs. Weevils chew through vines and eat up leaves very quickly. They will get to meet up with some diatomaceous earth later today. It's a natural pest control made from hard shell algae.


I'm a little bit late on getting some of my Fall plants in. We just hosted a weekend long party at a Summer Camp with about 150 people. So... we were a bit busy. Pretty good excuse eh? The Cucumber Harp has finished it's Summer duty and is moving on to Sugar Snap Harp Fall duty. I did dump out the compost tumbler. All of this Summer's kitchen compost made a soupy wheel barrow full of goodness. It had the smell of loose stool. Yummy!

I found myself gagging as I spread it throughout all of the veggie beds. Next, I raked and turned the soil over. I will let the soil rest for a few days and then sow some seeds. Really, I need to let my own body rest a few days. I was feeling the work last night as my round ligaments kept spasming. Fun!


Our kitchen window is still full of tomatoes. These maters will probably end up in a sauce for storage. I can't seem to handle any more tomatoes right now.  But, warm pasta sauce in the Winter sounds good. Wait! I don't want to jump ahead to Winter yet...I have a feeling it's going to be a nice Fall season!

Monday, August 9, 2010

More of the same and some new...

This morning I harvested more peppers, tomatoes, cucumbers, okra, and basil. I love all of these things but I'm ready for some other varieties to come in.


I have acorn squash, spaghetti squash, pole beans, carrots, watermelon and pumpkins all growing right now. I need to sow some more seeds this week. I'm thinking It's time to put in some more collards, beets, radish, and maybe some broccoli? Lettuce will have to wait. It's still too hot for their fragile leaves.

The cucumber plants are on their last leg and I finally ripped out all of the squash and zucchini. So, there is plenty of room for more veggies. My Summer compost is done cooking. I will give the dirt a fresh mix of compost this week too.

It's been a crazy couple of weeks for me. A lot of indirect drama and a ton of worry for my family. I'm looking forward to tilling the earth and saying some silent prayers for healing in my family. I know that all shall be well in time.

Meanwhile.... my belly is really starting to broadcast the impending arrival of our first child. Can't suck it in anymore. HA!

Tuesday, August 3, 2010

Sun Tea and Excuses

I just read Ashley English's(from Small Measure) new Post on Design Sponge. She talks about an old favorite...Sun Teas! I felt like she just knocked me upside the head. I remember my Dad putting out jugs of sun tea at our first house in Lewisville. He only did this a few times that I remember. I found it amazing that the Sun could make tea! Duh! I was around 7 so give me a break.

How green can you get, really? Use the sun! Not to mention we have lots of herbs growing around the yard. I'm running out of uses. This one is so easy...

Drop some mint or other yummy herbs into a mason jar, throw in a family size lipton tea bag (I used decaf), add some organic sugar or honey if you want, fill with water, and put it in the sun for 5-8 hours.

Garden Update Excuses...
I have been avoiding the heat. We have had two ridiculous heat waves in Charlotte this Summer. I'm growing a person right now and the heat just isn't jiving with my incubator status. I do have some new plants in the ground for Fall. More updates to come soon as new things start coming up in the garden.

For now...Summer Sun Tea :)

Wednesday, July 14, 2010

What's Happening in the Garden today...

 Lots of different varieties of peppers are coming in. We have really enjoyed these banana peppers.
I have to admit that I have been eating a cucumber at lunch everyday for a week. Just sliced with salt and pepper. 
This squash is a volunteer. Looks interesting right? Well, we had one a few weeks ago. When I cut it open, I discovered it's a spaghetti squash. I guess it's green because of the zucchinis planted beside it? Garden mystery.

Yesterday I posted about the tomato frenzy going on here. 'Maters still on the vine...
I have been patiently awaiting the dahilias to bloom. They are so precious and full of color. I just love them.

Tuesday, July 13, 2010

Maters

This is the time of year when your neighbor rings your doorbell and runs, leaving you a bag of tomatoes. It's a ridiculous tomato season here this year. I went to visit with my Brother in law Jason last week. He has 2lb tomatoes! Seriously, they are the size of a baby's head. Jason is a gifted farmer and we marvel over his giant produce. Mine don't grow quite that big but we have plenty of tomatoes rolling in.

This year I started from seed: Golden Tomatoes, Romas and Heirloom Big Boys. My neighbor gave me one starter tomato that is a Cherokee Purple. From my compost...we have lots of cherry tomato volunteers. I stopped planting cherry tomatoes two years ago because they just keep coming back.

One thing to keep in mind with tomatoes...they love two things...Sun and Food! They are very heavy feeders and love rich soil, compost, and organic food. I fed mine right before they bloomed and they jumped a foot and blasted out blossoms. The rest of the job is done by that big star in the sky.

So, now it's finding a million ways to skin a tomato. Right now I'm just enjoying slicing them and eating them when they are still warm. But, my tolerance for tomato acid starts to wear me out. Anybody else get burning lips from tomato acid? I see canning a lot salsa and sauces in my near future.

My very favorite tomato combination is a classic:

Sliced Maters
Sliced fresh Mozzarella
Chopped fresh Basil

stack them up

Sprinkle with olive oil and balsamic vinegar and a dash of pepper.


It's so simple but sooooo very right. YUMMY!

Monday, June 28, 2010

Potato Gamble

Excuse me for the delay on posting again. The heat here in NC has been stupid. We have had 15 days straight of high 90s weather. Did I mention it is only June? So, my time in the garden has been basically to do drive by waterings and weedings. I think some of the squash plants are suffering from the heat but the tomatoes are lovvvvvving it.

What I really wanted to share today was my sudo surprise crop of potatoes. In early Spring I had a organic produce delivery coming that was bringing us potatoes every two weeks. I couldn't keep up with that many potatoes in such a short period of time. A few of the potatoes began to sprout and I just kind of ignored the science experiment for a while. Eventually I knew I had to either chuck them or plant them.

I haven't tried planting organic potatoes from my purchased produce. I have only used slips that I purchased. The same goes for sweet potatoes (until this year :). Everything I have read said that planting ones from stores or farmers market are a gamble. Well, I guess I should go to Vegas!

Today I pulled a couple of the plants that were beginning to wilt. I found a small happy crop of potatoes screaming to get out of the boiling soil. I love harvesting potatoes. It is so fun to drive the pitch fork into the soil, turn it over and see potatoes rolling out everywhere. It feels like a archaeological excavation. Now I have more room for sweet potatoes.

By the way, those sweet potatoes that I was using to grow my own slips...I'm still harvesting slips off those. I think I have more than 20 from each potato. I had to start giving them away because I didn't have enough room in my garden. So, save those organic spuds that didn't make it to your plate. Plant them and see what happens. You never know.

Monday, June 21, 2010

Sneaky Produce

I have been noticing that the squash and zucchini plants are kind of sneaky. Those big leaves tend to hide all kinds of goodies. I nearly tripped over this large zucchini just now.

Sneaky produce...

Tuesday, June 15, 2010

Pickles

Our pickling cucumbers have been coming in thanks to the handy cucumber harp. I'm realizing I may be making pickles every few days for the next few weeks. I have read that it is best to do it when they are fresh off the vine.


Ashley English has a great book called Canning & Preserving from her Homemade Living Series. For all of you designers out there...this is a gorgeous book! The book includes a simple dill pickle recipe and I decided to go with that. I did add some horseradish to the recipe...other than that...it is straight out of her book. Check out her blog over at Small Measure.

Before I went to bed last night, I cut the pickles into spears and chips. I put them in a salt brine with 1/2 a cup of pickling salt and water. I'm glad I remembered to do this before I crawled into my sleepy pants. This morning I went out and hunted down some jars. I don't have any that I thought would work and it was time for the investment. I bought pint size and small mouth quart jars. I wasn't really sure what I would need this season. I still need some small ones for preserves.

I bought a steam canner last year. I really like this canner because it uses a lot less water and heats up super fast. It is just a personal preference. You can use a regular water bath to make pickles too. I use the steam canner to sterilize the jars as well.

6 lbs pickling cucumbers
3/4 cup pickling salt(divided)
4 cups white vinegar
Garlic cloves, peeled
Dill seed
Fresh Dill (I used the dill I have been freezing)
Black Peppercorns

1. Rinse and clean the cucs in cold H2O. Remove slice from blossom end. If you can't tell then trim both ends. Place them into ceramic or glass bowl. Add 1/2 cup pickling salt and cover the pickles with water. Put them in a cool place or the fridge for 8 hours...or over night.

2. Drain off the brine. Rinse cucs thoroughly. Set aside.

3. Sterilize 8 pint mason jars, lids and screw rings. (I used pint and quart jars...just double ingredients that you put inside the quart jars).

4. In a medium stainless steel pan, combine vinegar, 3 1/2 cups water and 1/4 cup pickling salt. Bring the brine to a boil, reduce heat, and simmer for 5 minutes. Remove from heat, and set aside.

5. Into each sterilized jar, place 1 garlic clove, 1/2 teaspoon dill seed, 1 dill head, and 8 black peppercorns.

6. Pack cucumbers into each jar, and cover with the brine solution. Leave 1/2 " headspace. Use a nonmetallic spatula to remove any trapped air bubbles, and wipe the rime clean with a damp cloth. Place on lids and screw bands, tightening only fingertip-tight.

7. Process for 10 minutes in a boiling water bath (or steam canner :). Adjust for altitude.

The pictures tell the rest of the story. We will be enjoying these pickles in two weeks.

Saturday, June 12, 2010

Today's Harvest

Basil, Carrots, Beats, Collard Greens, Lettuce Mix, Jalapenos, Banana Peppers, Green Beans...Yummy!

Wednesday, June 9, 2010

Zuccasquash


I have been bringing in squash and zucchini everyday this week. 


Here is today's catch...


I have heard you can get some strange cross breeds going on in the garden sometimes.
 I think that large squash with the two tones might be a Zuccsquash. Kind of like a Pikashit (pekingese x Shitzu) or a Bullshit (Pitbull x Shitzu) :)
I have a couple of large zucchini plants that are rubbing elbows with some volunteer squash. That is where this zuccasquash came from.


I'm wondering if I will get some Waterloupes or Acornumpkins? This could get interesting.


Do you think people would balk at these freaks of nature at a tailgate market or could I charge double for my exotic breed? 

Tuesday, June 8, 2010

Collard Greens

Over the last few weeks I have been harvesting some of the collard greens out of our garden. I have found that I can trim the outside leaves and the plant will keep growing new ones. Bonus!


Last night I went with a southern meal. Mac n Cheese, Collard Greens, and Sauteed Squash. The summer squash was also from the garden. Matt has been working hard trimming trees in the yard and I wanted to reward him with his favorite Mac n Cheese. The collards went great with this combo!


I think that a lot of folks turn their nose at collards. Not sure why really. Maybe it's the idea of hog jaw or bacon in them? Well, I don't use any swine in mine. Here is how I rock my collards...


- Clean and trim about 1lb of Collard Greens
- Chop one Vidalia onion
- mince 2 gloves of garlic
- Measure out 1 tsp of red chili pepper flakes
- Measure out 2 cups organic vegetable broth (or you can use beef or chicken broth if you want)


Turn stove top on low heat and dig out a pot with a lid. Sprinkle in about 2 tlbs of olive oil. Throw in onions, garlic, and red pepper flakes. Saute for about 2 minutes or until onions are a golden color. Toss in Collard Greens and stir for about 1 minute till they wilt down to half their size. Pour in Vegetable broth and give a good stir. Simmer for about 45 minutes. You can add pepper and salt if you like to but I don't. Also, some folks like to splash a little white vinegar on them when they are done. It's up to you.


Enjoy!

Tuesday, June 1, 2010

Today's Harvest


The garden is producing enough for daily harvest now...

Lettuce, Collard Greens, Jalapenos, Super Chilies, Daikon, Green Beans and Basil.

Monday, May 31, 2010

Bush Beans

It's 'bean' crazy keeping up with the bean harvest this past week. I put in 54 bush bean plants in one of the raised beds this year (9 plants per square). In the past years I put in maybe 8 and would only get enough beans for a couple of dinners. I really wanted to be able to freeze some beans this year. It looks like I will be busy cooking and freezing this week.


How to freeze Green Beans...

1)Trim off ends of beans and rinse
2) Bring large pot of water to boil
3) Prepare a large bowl of ice water with enough room to throw beans in
4) Toss beans  into boiling water and let them blanch for 3-7 minutes (the beans should be bright green)
5) Quickly Strain the beans and then put them into the bowl with ice water. Cool them for the same length of time that you blanched them. The cold water stops them from cooking.
6) Strain the beans
7) But beans into freezer Ziploc bags and use a straw to suck out any extra air or use a vacuum sealer.


The beans should last up to 7 months in the freezer...so make sure to date them!

On a side note: You can do this with beans from your local farmers market. Just make sure they were harvested within 48 hours of going to the market. If beans aren't fresh, they become rubbery.

Sunday, May 30, 2010

Cucumber Harp

Growing vertically in the garden not only helps you save space but it can also help you with pest control. Matt helped me put this 'cucumber harp' together at the beginning of the growing season. I think it turned out to be more of a functional art piece. We used three pieces of bamboo that my neighbor Bill harvested from a lot in our neighborhood. I weaved some regular garden yarn vertically with a spacing of about 6" apart. I also wove three horizontal rows 6" apart on the bottom. Guess how far apart the plants are spaced...6". The bottom horizontal rows are just to give the plants extra support when they are starting off.

We have two varieties of pickling cucumbers and 1 variety of regular heirloom cucumbers growing up the harp. One of the pickling cucumber varieties are heirloom seeds from Matt's Step-Grandmother June. They are white pickling cucumbers and June always shares her yummy pickles with the family. They are a huge hit and I can't wait to try and carry on the tradition. In the last week all of the plants have really took off...climbing and climbing.

I'm happy to see the bees are plentiful in the garden now. I was worried that I hadn't seen that many. With all of the squash and cucumbers showing off their yellow blossoms, the bees are having a good time. I used to run when I saw a bee but now I feel like I have some little helpers in the garden. I really appreciate all of their hard work.

I have been freezing lots of our dill to get ready for pickling. It is an easy thing to do. I never  have been able to use all of our dill when it is fresh. You can trim dill sprigs so that they only have about 1" of stem. Rinse them and pat them dry. Place them into freezer bags. Make sure to push out all of the air. Lay them in the freezer flat and in a place where they will not be crushed. They freeze just beautifully.

Can't wait to eat fresh cucumbers and to start pickling!

Tuesday, May 25, 2010

What is this? A white carrot?

"What is this? Is it a white carrot? I didn't know we sold this."
This is usually what I hear from the super market clerk whenever I purchase daikon. A manager is called over to hunt down the strange root in the produce section. I get the same blank stare when I buy a watermelon radish.

I was excited to see daikon seeds in the heirloom seed catalog this year. I haven't ever really considered growing some of the less famous varieties but I couldn't wait to try. The seeds went in early March under the cover of our 'greenhouse'. They sprouted quickly, just like my regular radish varieties.

A little lesson learned: I planted them using the square foot garden measurements for regular radish, which is 16 per square. I wasn't considering the rather large size that daikon can grow to. Mine ended up being smaller as a result but it's okay. Sometimes, you have to learn these things as you go or grow. We have about 5 dozen that we are harvesting over the next few weeks.

Daikon can be used raw or cooked. I personally prefer it raw in salads. I don't eat raw onion and find that I like radish as a substitute. I have also read that you can use the greens just like turnip greens. We will have to give that a try.

Here is a recipe for Pickled Daikon and Carrots:
(Makes 6 servings)

Ingredients:
1/2 pound daikon 
1 carrot 
1 tablespoon canning salt
1 cup water
1/4 cup distilled white vinegar
1 tablespoon sugar
1 teaspoon red pepper flakes (optional)


Directions:
Wash, peel and shred daikon and carrots. Put vegetables in a bowl, sprinkle on the salt and mix well. Let stand for 30 minutes. 

Drain off water and squeeze vegetables as dry as possible. 

In a small bowl combine vinegar, sugar and pepper flakes. 

Place in a clean quart-size jar and refrigerate overnight or 6-8 hours